Showing posts with label club kit. Show all posts
Sunday, 6 February 2011
Monday, 15 November 2010
Hi & tonights kit!
Big thanks to Jannene and Mum for a sterling job running the club tonight. Sorry to hear about the heating, Ill try and find out whats happening before next club night, and let you know.
Here's as promised is the photo of the finished layout. It's based on a beautiful design by Amanda Muirhead of the Prima Design Team, which uses the same prima papers etc. The flowers are chalked to co-ordinate with the papers. The title is from cricut cartridge 'Home Decor'. If you don't have this cartridge, then Sharon is taking orders and will cut out the title for you on black cardstock for just 20p! a bargain!
Detail of chalked flowers
Hope you enjoyed the evening, and hopefully Ill be back on my feet before the heritage night!
xx
Saturday, 13 November 2010
This weeks kit - what you need......
Ive made a single page layout, but with some jiggling theres plenty there for a double page layout. For those that are doing this weeks club kit you need the following:-
one 4x6" landscape photo
Chalks - I used a soft peachy rose colour and a bit of burgandy (but not much!)
Needle and embroidery floss - I used a soft light peach, but a cream or rose colour would be fine
Pokey tool (paper piercing tool!) and foam mat or mouse mat
Pencil
Ill post a photo of the completed layout next week! enjoy club on Monday and dont forget to put your name down for the Christmas Party!
xx
one 4x6" landscape photo
Chalks - I used a soft peachy rose colour and a bit of burgandy (but not much!)
Needle and embroidery floss - I used a soft light peach, but a cream or rose colour would be fine
Pokey tool (paper piercing tool!) and foam mat or mouse mat
Pencil
Ill post a photo of the completed layout next week! enjoy club on Monday and dont forget to put your name down for the Christmas Party!
xx
Friday, 12 November 2010
Last Weeks Club Kit and Sneak Peek!
Last Weeks Kit
Last weeks club kit was designed especially for Scrapaholix by the Bo Bunny design team. Its a lovely mix of tropical colours with some fab Bazzil gems accents. We were lucky to have instructions for the kit written by Sarah, as Im still off with my broken Ankle - Im sure you all enjoyed the 'break' away from me - ha ha! There are just two kits left, let me know if you want one of them before they are returned.
Sneak Peek
This weeks kit is by Prima and uses their brand new line, Fairy Fauna - its Gorgeous! and one I picked out for club myself! I havent done anything with the kit yet but I have a few ideas! As Im still out of action, Monday's class will be taught by Jannene, but everyone will have instructions again to guide you through.
Ill update the blog again once Ive designed the layout, so you know what to bring on Monday.
Last weeks club kit was designed especially for Scrapaholix by the Bo Bunny design team. Its a lovely mix of tropical colours with some fab Bazzil gems accents. We were lucky to have instructions for the kit written by Sarah, as Im still off with my broken Ankle - Im sure you all enjoyed the 'break' away from me - ha ha! There are just two kits left, let me know if you want one of them before they are returned.
Sneak Peek
This weeks kit is by Prima and uses their brand new line, Fairy Fauna - its Gorgeous! and one I picked out for club myself! I havent done anything with the kit yet but I have a few ideas! As Im still out of action, Monday's class will be taught by Jannene, but everyone will have instructions again to guide you through.
Ill update the blog again once Ive designed the layout, so you know what to bring on Monday.
Rolled flowers tutorial
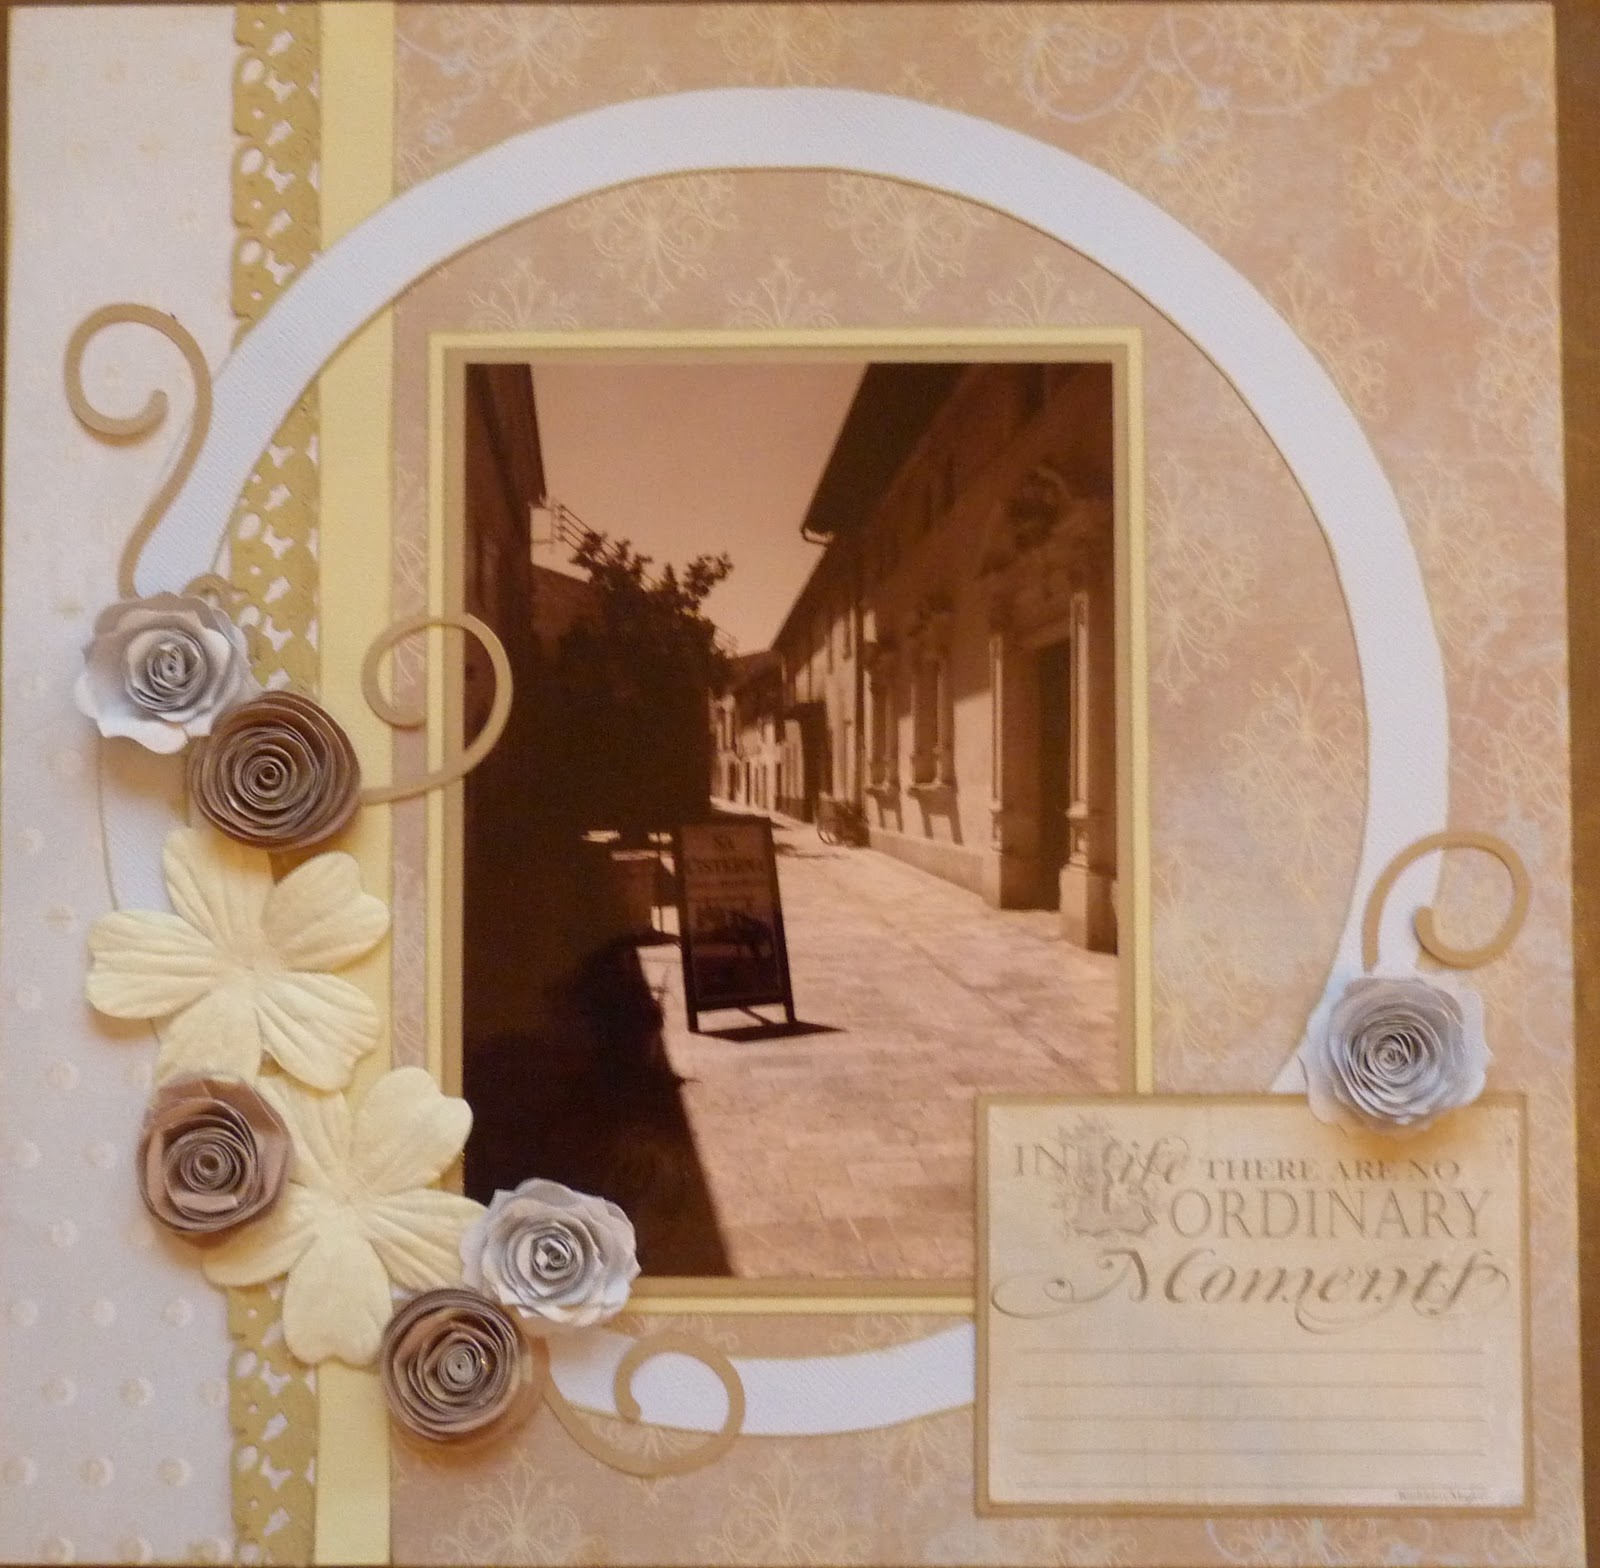
A few gals have been asking me about the flowers that were on the recent layout that we did at club a few weeks ago. Ive found the flower tutorial for the rolled flowers on this blog - (sorry I don't know the blog holders name! so apologies but thanks for the tutorial!)
Flower tutorial
They were basically created using a 3" square, cut into a spiral and rolled. The lighter colour ones were cut using a pair of wavy edge sizzors. There were a lot more flowers when I started, but unfortunatly Millie our cat took a shine to them and knicked a few before I had a chance to glue them in position.......
The lace that you can just see in the second photo, is actually white paper lace, I just used the back of a spoon to run it along a Tim Holtz distress ink in antique linen.
The photo is one we took in Majorca, a lovely alley with adobe walls, the sepia is slightly darker than I would have liked, so Ill probably lighten it slightly and re-do the photo again.
Enjoy!
Flower tutorial
They were basically created using a 3" square, cut into a spiral and rolled. The lighter colour ones were cut using a pair of wavy edge sizzors. There were a lot more flowers when I started, but unfortunatly Millie our cat took a shine to them and knicked a few before I had a chance to glue them in position.......
The lace that you can just see in the second photo, is actually white paper lace, I just used the back of a spoon to run it along a Tim Holtz distress ink in antique linen.
The photo is one we took in Majorca, a lovely alley with adobe walls, the sepia is slightly darker than I would have liked, so Ill probably lighten it slightly and re-do the photo again.
Enjoy!
Subscribe to:
Posts (Atom)